Tag Archives: shrubs

FULFILL THE DREAM OF CREATING A POLLINATOR GARDEN

WHY NOT TURN YOU LAWN INTO A CERTIFIED HABITAT GARDEN FOR BUTTERFLIES, BEES, BIRDS?

Turning a lawn into certified pollinator habitat gardenWe’re helping a homeowner in Seekonk, MA fulfill her dream of turning most of her lawn into pollinator habitat. Collaborating through the iterative design, installation, and maintenance phases, the client herself has gotten earth under her fingernails and dirtied the knees of her jeans every step of the way.

In the 2020 season we designed and installed two crescent-shaped ornamental landscape beds for MA native trees, shrubs and perennials. In the spring of 2021 we’re expanding upon last year’s work by tying in a larger portion of the back yard lawn. Because we have time on our side before the arrival of native plant meadow kits from the Native Plant Trust, we’re using the sheet composting aka lasagna method of turning lawn into garden beds.

Using flags and garden hoses, we laid out the shape of the new planting area, tweaked it, then committed to it by laying down two layers of heavy cardboard that came from local bicycle and appliance stores. The cardboard keeps sunlight from the grass to keep it from growing.

On top of the cardboard we’ll be laying down high quality drip irrigation hoses, aka pipes, that will tie into the existing lawn irrigation system. The pop-up sprinkler heads of the zone where this section of pollinator bed is going were removed and capped to preserve water, water pressure, and associated financial costs. Continue reading

Please follow and like us:

Shrubs to Prune in Late Winter – Which Ones and How?


hydrid Kordesii Rose ‘John Davis’

The hydrid Kordesii Rose ‘John Davis’ is a hard-working rose that blooms periodically from June to September on new wood. Prune it in late winter for the strongest show all season.

Late winter to early spring is a terrific time for pruning many shrubs. What should you prune and when? You could study pruning for an entire semester, but here are some basic guidelines. I recommend that you properly identify, then research, each particular kind of woody plant before you consider your first cut:

  • Safety first 1) If any part of a tree or shrub is within ten feet of any kind of electric cable or wire, stop and call a professional. 2) Wear gloves and sturdy shoes, and use only sharp tools like bypass (not anvil) hand pruners and loppers, and saws. 3) Sanitize your tools and gloves with isopropyl alcohol or a product like Lysol spray before you start, and again when you’re done pruning each individual plant.
  • General concepts Notice the overall shape of the shrub. Most flowering shrubs should be balanced and open in their center. Start pruning by removing all dead and diseased branches, then look for branches that cross or touch each other. Rubbing branches damage the bark tissue, inviting pathogens and pests, so remove one or both branches, depending on their condition, all the way to the base. Branches that grow from the perimeter towards the center should usually be removed. To shorten a branch or twig, cut it 1/4 inch above an outward-facing bud so new growth heads towards the perimeter of the shrub.
  • When does your shrub bloom? 1) For spring bloomers, pruning them during the late dormant period (late winter/early spring) will remove flower buds, which were formed last year after the shrub bloomed. No flower buds, no flowers, so wait until after they bloom this year. 2) For later bloomers, pruning them now, before they form this year’s flower buds, is ideal. These can also be pruned soon after blooming.
  • Roses Relax. Roses are simply shrubs that benefit from annual pruning. Prune in late winter to early spring (late dormancy) or when the buds start to swell. First cut out dead, broken, diseased and crossing canes. Put all your pruning debris in a trash bag and throw it away. Do not compost. Fertilize your roses with something like Espoma Rose-Tone or a good organic slow release fertilizer by following the directions on the bag. Climbers like to keep their main stems, so keep them fresh by pruning their lateral branches. Once the main stems are three years old, consider cutting one or two of them to their base to encourage new ones. Then cut one or two of the oldest every year. For shrub roses, cut up to 1/3 of the canes, the oldest, thickest woody ones, to their base as you open up the overall look to a vase shape. Cut to their base any super skinny canes from last year. For height, cut the remaining canes to about 1/2 their height, 1/4 inch above a robust outward-facing bud.

Please feel free to contact Carol with any questions.


Please follow and like us:

What is the Value of Saving Established Perennials and Shrubs during a Home Renovation?

Wygelia and hydrangea macrophylla shrubs to be saved

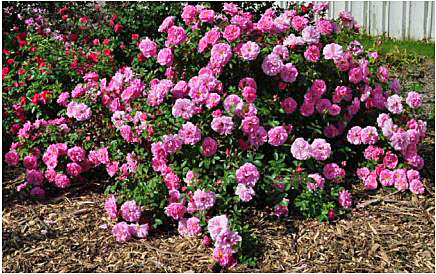
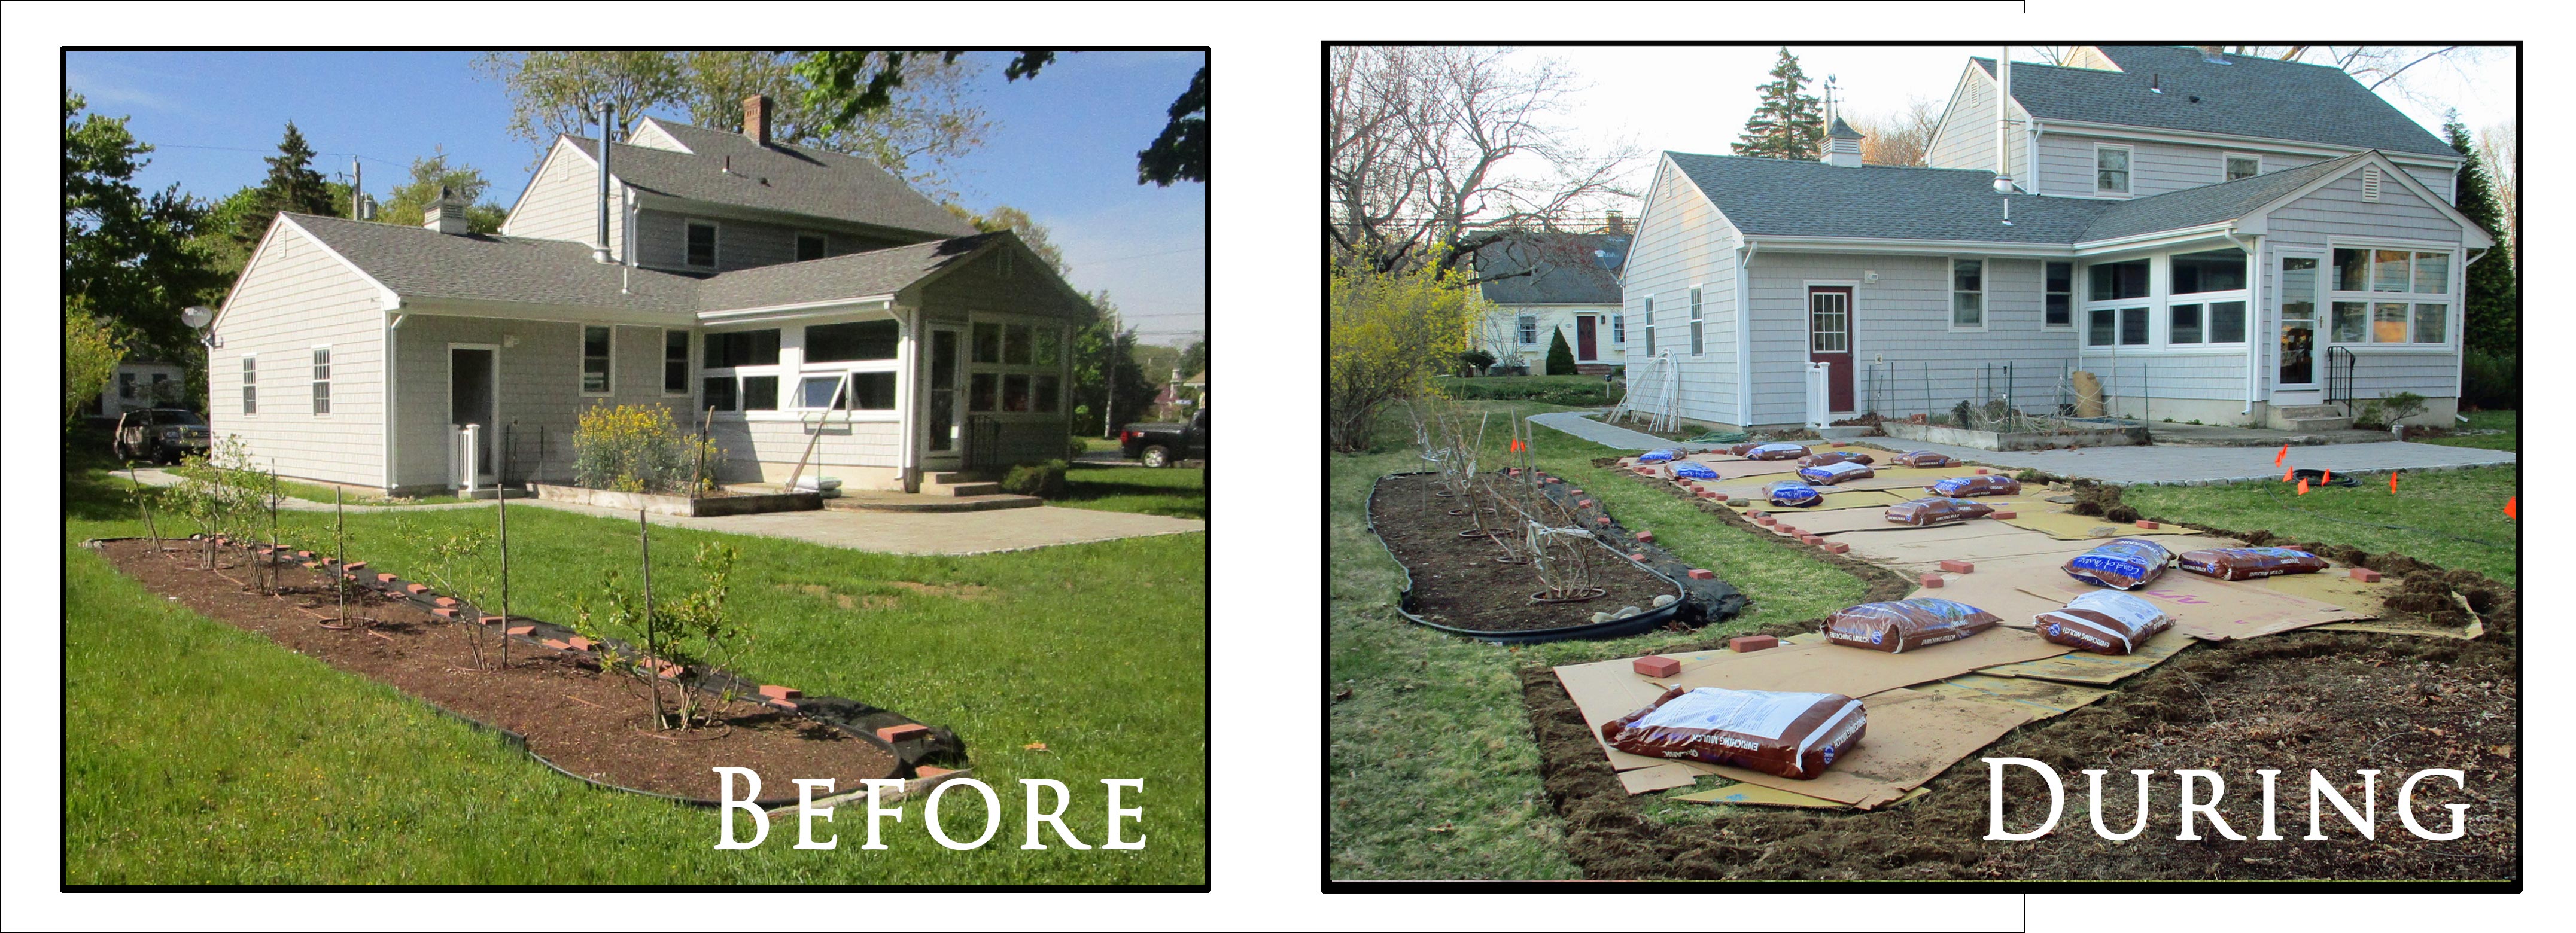
Is it worth saving shrubs before your renovation begins? Wygelia and Hydrangea macrophylla shrubs will be saved at this Sharon, MA home, but how would you decide?

Imagine that when you were a child your parents loved gardening, and over time you helped your family create secret gardens and woodland paths that changed daily with new sprouts pushing up from the earth, turning into a bounty of ever-changing blooms, and you loved every petal and leaf of it all.

Now, imagine that you’re middle aged and still living in that same beloved 1950’s ranch, but you’re ready to tear it down to build your dream home, and save as many of your family’s horticulture heirlooms as possible. You’ve come to appreciate that many of the plants your family selected and nurtured are quite unique.

Sharon, MA homeowners in this situation called in Carol Lundeen, owner of Garden-911 Boston, for landscape renovation consulting and horticulture services to help them make their decisions. The excavation crew was expected to start in a couple of days, and we needed to establish priorities, make a plan, and get a move on.

How do you decide which heirloom plants to keep and which to abandon to the dumpster? Here’s how we worked together:

First, we contrasted the emotional and financial value of various plantings. The client had many childhood memories in specific areas of the property, especially around the patio, past the boxwoods (Buxus sp.) and up the path into the woodland, past the doll’s eyes plants (Actaea pachypoda). There was also the giant Wygelia whose branches arched over the front door entryway, and if it could talk it would tell more than half a century of stories.

I reminded the client that financially it costs money to remove existing plantings (and manage their debris); to lift and temporarily relocate and care for existing plantings, then replant and reestablish them; and to purchase (plant selection and delivery) and install and establish new ones (site preparation and irrigating). Existing shrubs on the property were mostly well established beauties that would be costly to replace with same-size specimens, and perennials seemed to be everywhere. This client kept her sense of humor and broad perspective of the past and future, she asked lots of questions and we figured everything out together.

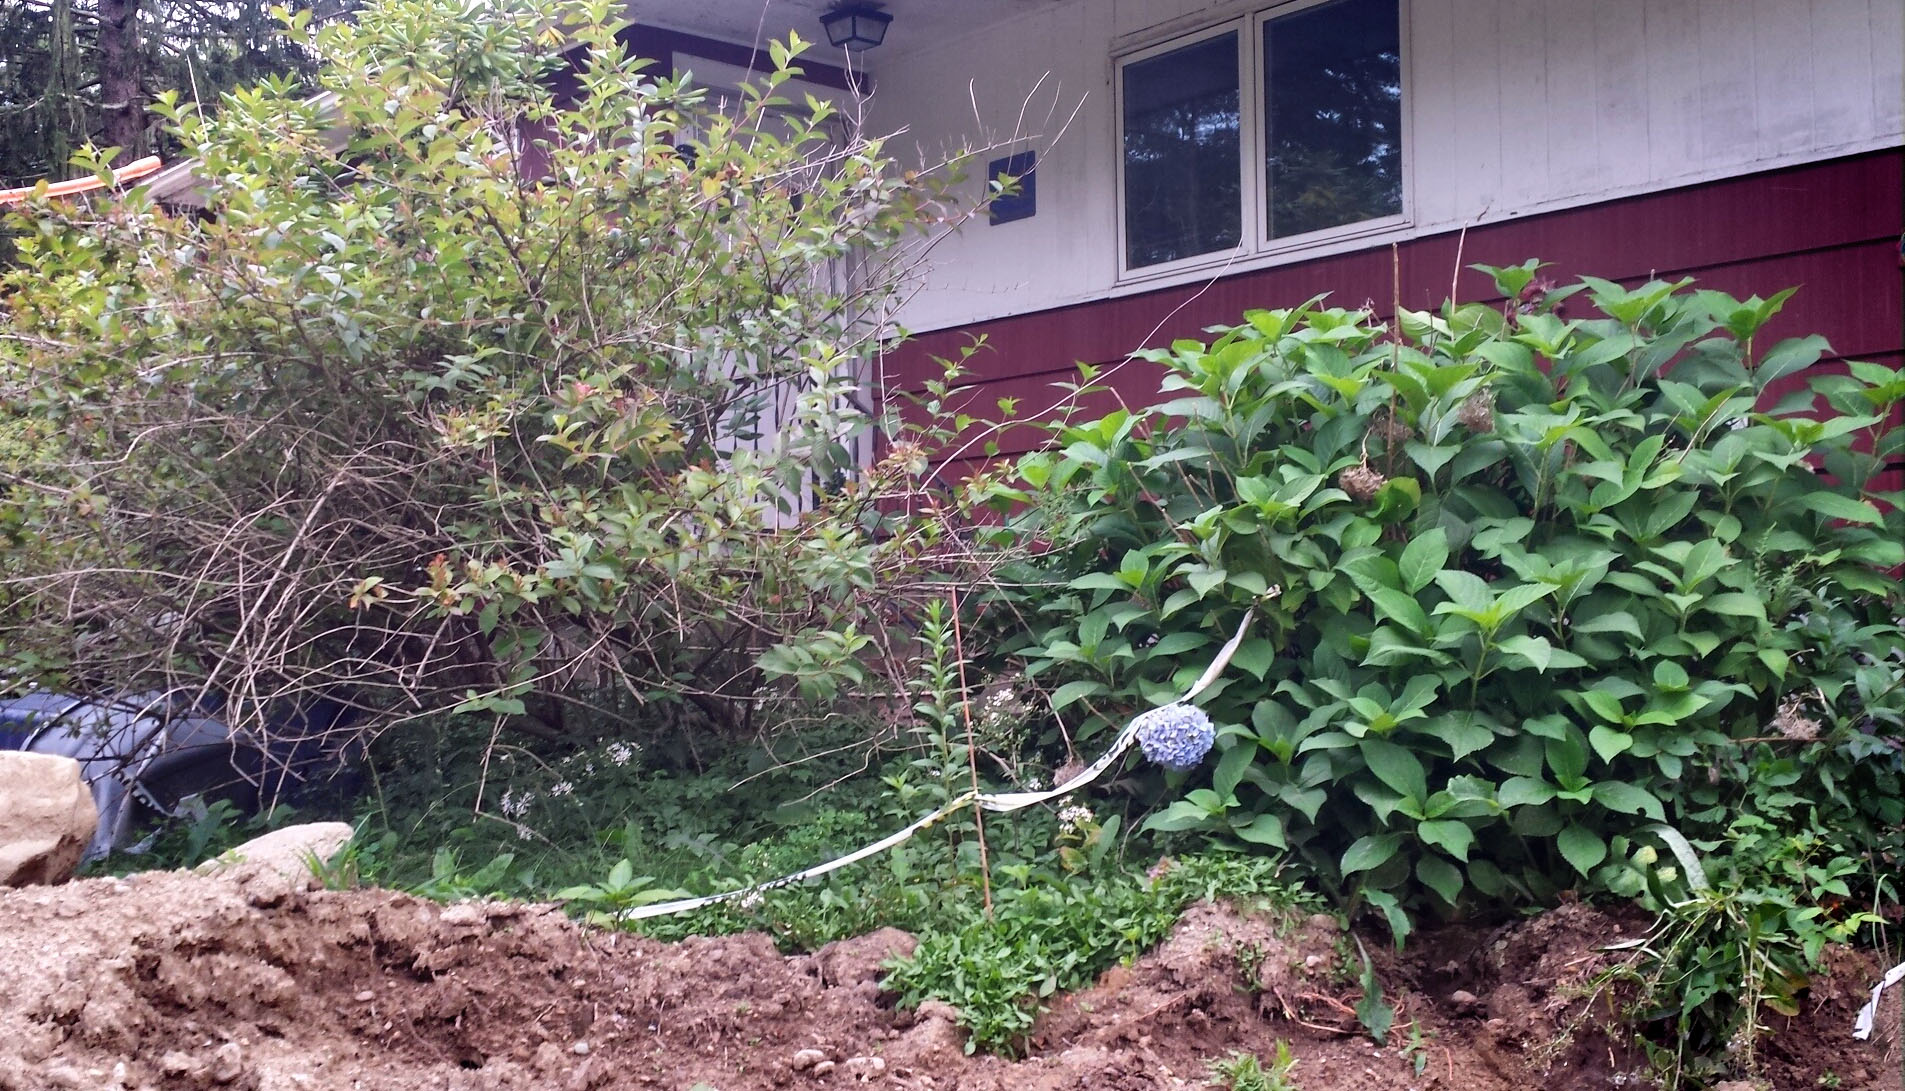
While he was already on the property, we had the excavator dig a trench in well-protected areas in the front and rear of the property, and with machines he lifted and placed many of the larger shrubs into the trench. Garden-911 Boston carefully backfilled by hand, irrigated, and mulched these specimens for the best possible outcome. Perennials were dug together by hand by the client and Garden-911 Boston owner Carol Lundeen, and we placed them into a long-overgrown garden area that we first had to clear of all manner of wild invasives vines and weeds, fallen-down raised beds and tangled chicken wire as the mini-excavator went to work nearby.

Eventually, as in all renovations, comes a period of being okay with not knowing when enough is enough. But most all very important plantings are safely stashed for the fall and winter, and spring will bring a new house and new possibilities for the client’s heirloom plants to re-establish in their new places. We’ll be working on the design together over the winter.

Please follow and like us:

TOP 5 GARDENING TIPS FOR APRIL

Do not work on your lawn or garden just after a big rain.

A note from a friendly frittilary butterfly: stepping in your garden or working on your lawn when the soil is wet damages your plants’ ability to thrive. (Image 2017 Carol Lundeen. ALL RIGHTS RESERVED)

#1. CAUTION: WET SOIL – DO NOT ENTER YOUR GARDEN – OR WORK ON YOUR LAWN!

  • Our recent rains have left our soils saturated, and if you step into your shrub and garden beds now you’ll be causing mostly invisible but meaningful damage that makes it harder for your plants to thrive.
  • Compacting your soil: plant roots depend on the spaces between soil particles to hold water and oxygen. When you step on wet soil, you compact these spaces and your plants suffer.
  • One cup of soil may hold as many bacteria as there are people on Earth, never mind the fungi, protozoa, nematodes, arthropods, and earthworms – most of which are beneficial to you most of the time. Together, these tiny beings are a living system called the Soil Food Web, and it’s best to not to step on them when the soil is wet.
  • To test if your soil is dry enough, take a handful of soil and squeeze it. If the soil crumbles easily when you open your hand, it is ready to be walked on or tilled. If it does not crumble, it is too wet. Allow the soil to dry for a few more days and test again before digging.

#2. GET YOUR SOIL TESTED – BEFORE YOU PLANT!

  • Before planting is a good time to get a Routine Soil Analysis from the UMass Soil and Plant Nutrient Testing Lab to check pH and fertility. This economical soil test will provide recommendations for liming and fertilizing as needed, as well as indicating the lead level in the soil.

#3. START YOUR COOL-SEASON VEGETABLES – ONCE THE SOIL DRAINS!

  • Now is a good time to sow seeds of cool season crops such as peas, lettuce, chard, kale, arugula, spinach, carrot, radish, beet and turnips.
  • Plant the seeds as soon as the ground can be worked. Sow your spinach, beets, radish, carrots and lettuce thickly in rows and thin later to the desired spacing (read the label) and to allow them to develop properly. Root crops such as carrots, beets, and radishes should be thinned to a 2-inch spacing to allow the roots to develop properly. They can be thinned as soon as they reach small edible size.

#4. EAGER TO JUMP START YOUR LAWN?

  • Your doctor wouldn’t give you a treatment without first making a diagnosis, right? Same goes with your lawn. Why treat your lawn for grubs or other turf insects if you don’t first discover what’s causing a problem? Grub populations are easy to evaluate, as are other sub-surface and surface insects. Once you diagnose properly, you can treat with a reasonable solution rather than automatically throwing money and chemicals at the situation.
  • Start weaning your lawn off the expensive, stepped conventional petrochemical-based fertilizers by switching to a slow release, low-nitrogen organic fertilizer like Roots Fresh Start. Apply once in early spring after the soil has begun to warm up and apply again in early fall. The water-insoluble nutrients will be recycled and released by your friendly soil microbes slowly over the entire growing season as they’re needed by your turf, rather than getting flushed (along with your money) away with rain and any irrigation.
  • Doing a lawn renovation this year? Wait until September for best results and return on your investment.

#5. MONITOR FOR WINTER MOTH CATERPILLARS

  • Winter moth caterpillars cause damage to many different deciduous plants such as oaks, maples, cherries, ash, crabapples, apples and blueberries. their eggs typically hatch early-mid April, and the young larvae quickly start feeding on flower buds, leaf buds and young developing leaves.
  • Winter moth egg hatch has not yet been observed for this growing season as of 4/5/17 in Massachusetts. Scouts are still reporting that winter moth eggs are orange in color and have not yet turned the blue color that indicates hatch is imminent. Eggs can be sprayed with dormant oil before they hatch, but the eggs can hide under pieces of bark and be hard to reach with spray.
  • Once the caterpillars hatch, they’re eager to eat their host plants. Dormant oil will no longer work, but there’s a fairly safe treatment that simply takes their appetite away. It’s a kind of bacteria called bacillus thuringiensis var. Kurstaki. In some forms it’s approved for use on organic farms. Always read and follow the label.

(BONUS #6.) CELEBRATE ARBOR DAY BY PLANTING A TREE ON APRIL 28 

  • Arbor Day is an annual observance that celebrates the role of trees in our lives and promotes tree planting and care. The best tree selection may be a native tree that is well suited to thrive in your yard with your existing soil, sun, water, and other cultural conditions. Have your soil tested before investing in your new tree or shrub.

AS ALWAYS,PLEASE FEEL FREE TO CONTACT ME IF YOU HAVE ANY QUESTIONS OR NEED A HAND! 

EMAIL CAROL  OR CALL 617-327-9254

Please follow and like us:

How to Keep Your Garden Plants Alive in Winter in a Drought

MA drought map showing more than one third of the state in extreme drought condition

MA drought map updated December 13, 2016.  The area in red, about one third of the state, is in an Extreme Drought condition.

What do you do keep your drought-stressed plants alive this winter?  It’s hard to put a Band-Aid on drought-stressed plants, but here are some things you can do:

  • KEEP WATERING UNTIL THE GROUND FREEZES IN THE FALL/EARLY WINTER.  Check with your city or town to see if even now, in late December, there’s a current watering ban.  Especially with new plantings, and also with drought-stressed ones, you generally want to give them the equivalent of one inch of water per week all the way until the ground freezes.  If time or water is limited, focus on watering your most valuable plants, such as trees and shrubs.
  • IMPROVE YOUR SOIL.  On your lawn for instance, just 1/4 inch of compost every fall makes a huge difference in the resilience of your turf plants.  For your planting beds, pull back the mulch, spread 1/2 inch of compost or leaf mold,  scratch it into the soil surface, and put the mulch back in place.  This will increase the soil’s ability to hold moisture and make nutrients more available to the roots of your plants.  Think in terms of feeding your soil (the soil food web), not feeding your plants.
  • MULCH.  It’s not to late to apply 2-3 inches of mulch to all areas of exposed soil.  Do not let mulch come in contact with the trunks of your trees and shrubs, where it transitions into the root.  This area is called the root flare and should never be covered.  If you see a mulch volcano around the base of a tree, the mulch is suffocating the tree, which stresses it, makes it vulnerable to pests and pathogens, and puts the tree on a path of decline.  About the best mulch of all is fallen leaves that you’ve chopped up with your lawn mower and spread on your beds.  Speaking of chopped leaves, you can also pile them up, adding water to create a water film on most of the leaf surface area, and let them sit for a year or two.  The result, called leaf mold, is another source of organic matter that will make your plants sing.
  • PLANT NATIVES.  Many people picture native plants as being weedy and leggy.  In fact, native plants are best adapted to not only survive, but thrive in the existing environmental conditions.  Test your soil and know how much sun your planting site gets.  Then, it’s easy to select plants that should do quite well with minimum inputs, once established.

For more info about the drought status in MA, visit http://droughtmonitor.unl.edu/Home/StateDroughtMonitor.aspx?MA

Please follow and like us: